
Josh Inglis converted his overnight start into a second Test century, while Alex Carey added 80 as Australia posted 429 at Newlands. South Africa lost three wickets in their second innings and remained under pressure in the series decider.
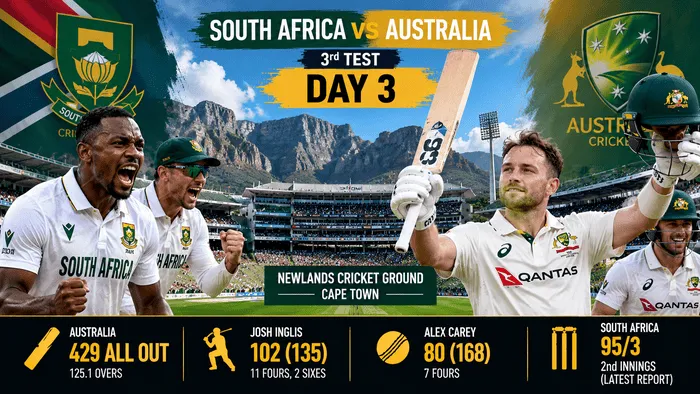
South Africa vs Australia 3rd Test: Match Summary
Australia took control of the third Test at Newlands on Day 3, turning a one-run overnight advantage into a 100-run first-innings lead. Josh Inglis scored 102, Alex Carey made 80 and Australia were eventually dismissed for 429 in 125.1 overs, 100 runs ahead of South Africa’s 329.
The morning session had begun with Australia at 330/4. Inglis and Carey continued their important partnership, but Simon Harmer removed both set batters and helped South Africa pull the innings back. Kagiso Rabada dismissed captain Pat Cummins for a duck, and Gerald Coetzee removed Mitchell Starc.
Australia still pushed beyond 400 through Cooper Connolly and the lower order. After lunch, Connolly made 29 before Marco Jansen completed the innings. South Africa’s reply then began under pressure: Aiden Markram fell for one, David Bedingham was dismissed for 11, and Marques Ackerman became a key figure in the effort to rebuild.
Match Details
Match: South Africa vs Australia, 3rd Test
Venue: Newlands, Cape Town
Date: October 27–31, 2026
Day covered: Day 3, October 29
Series before match: Level at 1–1
Quick Scorecard
South Africa 1st innings: 329 all out
Australia 1st innings: 429 all out
Australia lead: 100 runs
Josh Inglis: 102 off 135 balls
Alex Carey: 80 off 168 balls
Simon Harmer: 4/104
South Africa 2nd innings: 95/3 in the latest report
Australia First Innings: From 330/4 to 429 All Out
Australia resumed on 330/4 after a productive second day, with Inglis unbeaten on 85 and Carey on 51. Their fifth-wicket partnership had already moved the visitors ahead of South Africa’s 329, and the first task on Day 3 was to turn that narrow lead into a meaningful advantage.
The pair initially succeeded. Inglis reached his second Test century, and Carey continued to score carefully against a South African attack searching for a breakthrough. Their stand helped Australia move past 350 and then 370, putting the hosts under pressure on a surface that was beginning to offer more assistance to spin.
South Africa’s response came through Harmer. Inglis fell at 370, Carey followed at 379, and Cummins was dismissed for a duck at 380. Australia had lost three wickets in a short passage, allowing the hosts to prevent the visitors from running away with the innings.
Josh Inglis Scores 102 in a Defining Test Knock
Inglis’ 102 was the standout individual performance of Australia’s innings. Playing his sixth Test, the wicketkeeper-batter made the most of an opportunity after Steve Smith was unavailable. He reached his century with a reverse sweep off Harmer, bringing up the milestone from 132 balls before finishing on 102 from 135 deliveries.
His innings included 11 fours and two sixes. Inglis mixed controlled defence with decisive scoring options, particularly when South Africa tried to contain him with spin. The century matched his previous Test-best score and gave Australia a strong platform from which to build their first-innings lead.
The celebration was short-lived. Harmer removed Inglis soon after the milestone, with wicketkeeper Ryan Rickelton completing the catch. The dismissal gave South Africa a valuable breakthrough, but Inglis had already made a major contribution to Australia’s position.
Alex Carey’s 80 Helps Australia Build a Lead
Carey’s 80 off 168 balls was just as important to the shape of the innings. He offered a steady presence at the other end while Inglis attacked, helping the pair add 185 runs in 48 overs. Their partnership turned Australia’s overnight lead of one run into a position of control.
Carey struck seven fours and resisted for nearly three hours, but Harmer eventually found the edge. Aiden Markram took the catch at slip, ending Carey’s innings at 379/6. The wicket gave South Africa a chance to attack the tail with the lead still below 100.
Simon Harmer Leads South Africa’s Fightback
Harmer finished with 4/104 from 37 overs, making him South Africa’s leading wicket-taker in Australia’s innings. His dismissals of Inglis and Carey came at a crucial time, and he also removed Travis Head and Marnus Labuschagne earlier in the innings.
The off-spinner repeatedly challenged Australia’s batters to play with precision as the surface began to offer turn. His spell prevented the middle order from turning a strong platform into an even larger total.
Marco Jansen supported Harmer with 3/60 from 22.1 overs, including the wickets of Matt Renshaw, Cameron Green and Connolly. Rabada, Coetzee and Wiaan Mulder took one wicket each. The collective effort kept South Africa in the contest despite Australia’s century partnership.
South Africa’s Second Innings: Early Wickets Increase the Pressure
South Africa needed a composed response after conceding a 100-run first-innings deficit. Instead, Australia made an early breakthrough when Markram was caught by Travis Head off Mitchell Starc for one. The wicket reduced the hosts’ margin for error almost immediately.
Bedingham was next to fall, caught after attempting to attack Josh Hazlewood. His dismissal for 11 left South Africa needing a partnership to stop the innings from slipping away. Ackerman provided resistance, while captain Temba Bavuma also had work to do as the side tried to erase the deficit.
In the latest report available for this article, South Africa had reached 95/3. Ackerman was the key batter in the rebuild, while Australia continued to look for wickets that could turn their first-innings advantage into a decisive position. The score should be rechecked against the live scorecard before publication because the match was still in progress.
Turning Point: Inglis and Carey’s 185-Run Stand
The decisive passage in Australia’s innings was the partnership between Inglis and Carey. With Australia only one run ahead at the start of Day 3, South Africa needed an early breakthrough to keep the lead small. Instead, the pair added 185 runs, forcing the hosts to work through two set batters before they could attack the tail.
Harmer’s double strike briefly shifted momentum back towards South Africa, but Australia had already crossed 370. The lower order then added enough runs to take the total to 429, leaving South Africa with a 100-run deficit before beginning their second innings.
Key Performances
| Player | Performance | Impact |
|---|---|---|
| Josh Inglis | 102 off 135 balls | Scored a second Test century and helped Australia establish a lead. |
| Alex Carey | 80 off 168 balls | Shared a 185-run partnership with Inglis. |
| Matt Renshaw | 74 off 139 balls | Provided an important middle-order contribution. |
| Cameron Green | 65 off 110 balls | Added another half-century to Australia’s substantial total. |
| Simon Harmer | 4/104 in 37 overs | Removed Inglis and Carey and led South Africa’s bowling response. |
| Marco Jansen | 3/60 in 22.1 overs | Claimed three wickets, including Connolly to end the innings. |
| Mitchell Starc | Dismissed Markram in the second innings | Gave Australia an early breakthrough in South Africa’s reply. |
Why Australia Gained the Advantage
- Major fifth-wicket partnership: Inglis and Carey added 185 runs, changing a one-run overnight lead into a strong first-innings position.
- Contributions throughout the order: Renshaw and Green had already scored half-centuries before Inglis’ century and Carey’s 80.
- A 100-run lead: Australia’s 429 gave their bowlers a useful cushion before South Africa’s second innings.
- Early second-innings wickets: Starc removed Markram and Hazlewood dismissed Bedingham, increasing pressure on the hosts.
Why South Africa Remained in the Contest
- Harmer’s breakthroughs: His four wickets, especially Inglis and Carey, stopped Australia from stretching the lead much further.
- Jansen’s support: Three wickets helped South Africa finish the innings at 429 rather than allowing a much larger total.
- Ackerman’s resistance: His contribution in the second innings gave South Africa a route to rebuild after early losses.
Series Context and What’s Next
The three-Test series was level at 1–1 entering the decider. Australia won the opening Test in Durban by 214 runs, while South Africa responded with an innings-and-31-run victory in Gqeberha. The result at Newlands will decide the series and has added significance because the winner is expected to claim the top position in the Test rankings.
Australia will look to keep taking wickets and prevent South Africa from building a substantial second-innings lead. The hosts, meanwhile, need a longer partnership from their remaining batters before they can put pressure back on the visitors.
The match is scheduled to continue through October 31. Confirm the official scorecard for the latest score, fall of wickets and next session before adding a live update or a final result to this report.
Related Coverage
- More cricket news and match reports on 99ExCh
- South Africa vs Australia 3rd Test scorecard
- Day 3 live coverage from ABC Sport
FAQs: South Africa vs Australia 3rd Test Day 3
Josh Inglis scored 102 from 135 balls, including 11 fours and two sixes, in Australia’s first innings.
Australia were bowled out for 429 in 125.1 overs, taking a 100-run lead over South Africa’s 329.
Alex Carey scored 80 from 168 balls, including seven fours, and shared a 185-run partnership with Josh Inglis.
Simon Harmer took four wickets for 104 runs in 37 overs, while Marco Jansen claimed three wickets.
The latest report used here had South Africa at 95/3 in their second innings. Check the official live scorecard for any subsequent change.
The three-Test series was level at 1–1 entering the Newlands decider, with Australia winning the first Test and South Africa winning the second.
Final Verdict
Josh Inglis’ 102 and Alex Carey’s 80 helped Australia turn a narrow overnight lead into a 100-run first-innings advantage. South Africa’s response was unsettled by early wickets, but the match remained alive as the hosts tried to recover in their second innings.